If you want to fill a shape, the basic rule is that you need consecutive line segments that form a closed loop. You can also go into the shapesheet and set the NoFill cell of the Geometry section to False.

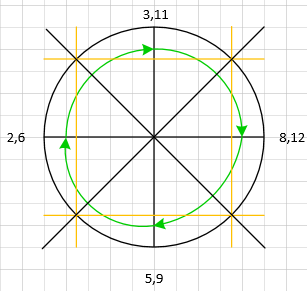
In this case, the numbers are the shapesheet row numbers, the green arrows show the direction the rows are going in and the yellow lines represent the values of the A and B cells.
This shape originally had four Geometry sections. I simplified it by adding extra rows to the first Geometry section and then copying the rows rows from the other Geometry sections.
but there is an easier way. Draw a circle, add a vertical and horizontal line that is longer than the diameter of the circle. Select the three shapes and align on center and align on middle, then Developer Operation Fragment.
Select the four quarter circles and do a Developer Operation Union.
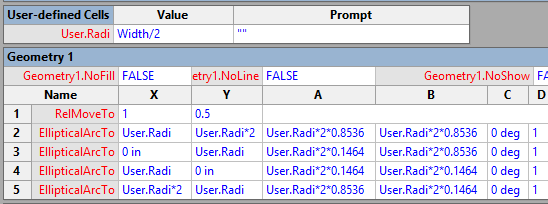
The resulting shapesheet should be.

This can be simplified because a circle has H=W so cell D can be simplified to “1”. Also the dependency on Height and Width should be removed and replaced with a User cell that defines the radius of the arc.
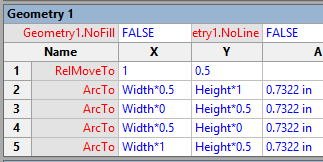
Since we are dealing with circular arcs, the row types can be changed from ElliticalArcTo to just ArcTo rows.
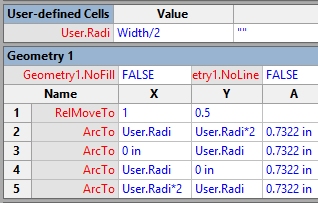
I did this to the original Geometry, so I will add the user cell.
So, you now know the basics of a circular arc and can add it to the shapesheet of a shape.
John… Visio MVP in x-aisle
JohnVisioMVP.ca
